You can construct a bibliography using the bibliography tool in OpenOffice 3.2. To do so, you must first create a bibliography database. You must then insert in-text references from your database. Finally, you may insert a bibliography that contains all of the references entered in the text.
Step 1:
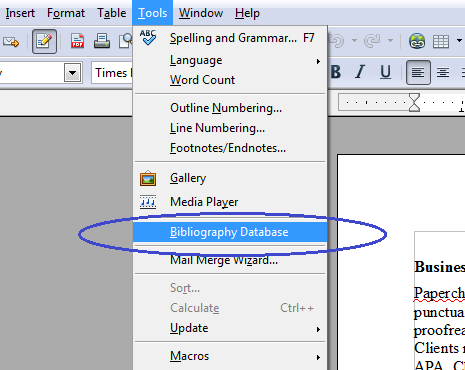
Open your document in OpenOffice 3.2 and locate Bibliography Database under the Tools menu.

- With a Microsoft 365 12‑month subscription, you can create, organize, and get things done.
- Bring out your best with premium Office apps, including Word, Excel, and PowerPoint.
- Easily access, edit, and share files and photos across all devices with 1 TB of OneDrive cloud storage.
- Keep it all together with Outlook, an ad‑free app for your email, calendars, to‑do lists and contacts plus security tools that keep your information protected.
- Protect your files with advanced security features like built‑in ransomware detection and recovery, and you can use two‑step identity verification to access your most important files in OneDrive Personal Vault.
Step 2:
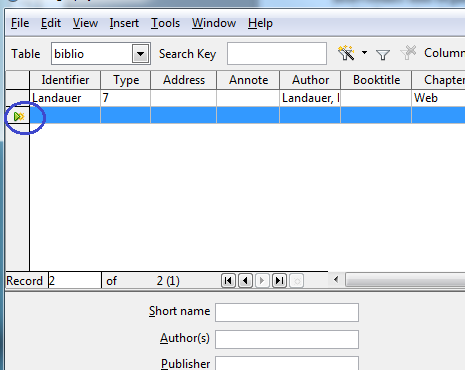
You should see a Bibliography Database window pop up. Click on the yellow star on the left, circled in the screenshot below. Note that if your database already contains many entries, this yellow button will be located among the arrows in the middle of the screen.

Step 3:
Type in the relevant fields for the reference in the boxes. In this example, we will use the information relevant to a scholarly journal. The text will be entered into its appropriate space in the database as you type.


- Essentials for productivity: Office Home and Student 2021.
- Classic Office apps: Word, Excel, and PowerPoint.
- Compatible with Windows 11, Windows 10, MAC.
- Ideal for students, perfect for home or school use.
- No subscription required.
Step 4:
To enter a new source, simply click on the yellow star at the left of the screen, as shown in the screenshot below.
Step 5:
With your document open in OpenOffice 3.2, place your cursor at the end of the sentence where you would like to place the reference. Locate the Insert tab and scroll to find Indexes and Tables, then select Bibliography Entry.

Step 6:
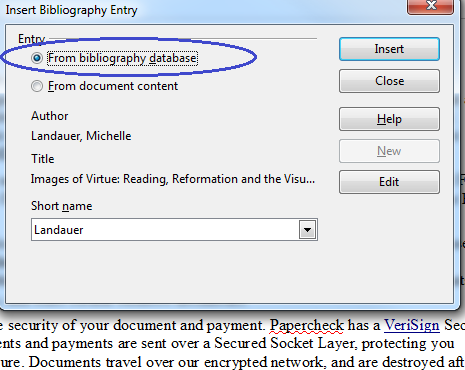
In the screenshot below, notice that a window has popped up. Select From bibliography database.
Step 7:
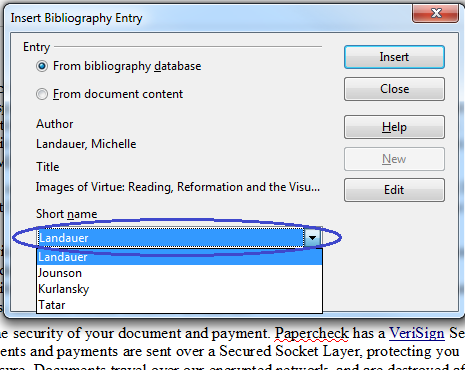
Find your reference in the drop-down menu under Short name, as shown below.
Step 8:
Once you have selected the appropriate short name corresponding to the text you wish to reference, click Insert.

Step 9:
In the screenshot below, the reference has been added.
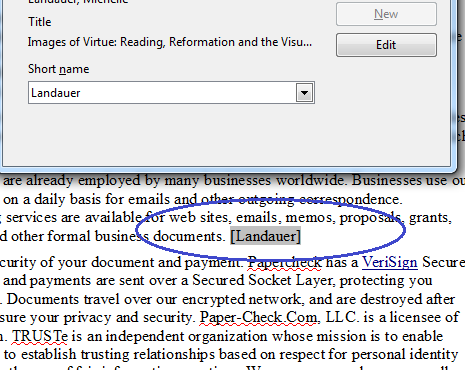
*Tip: Follow steps 5–9 to add the remaining citations.
Step 10:
Place your cursor at the end of the document. Under the Insert menu, choose Indexes and Tables within Indexes and Tables, as shown below.

Step 11:
In the pop-up window, choose Bibliography from the Type drop-down menu, as shown below.

Step 12:
Click on the Entries tab, as shown below.

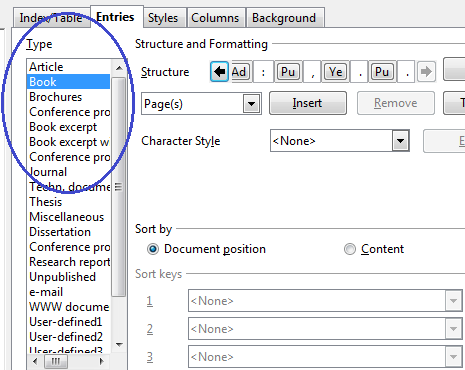
Step 13:
In this screen, you will set the format for each source type. In this example, we will set the structure for a book in MLA format. First, select the source type as shown in the screenshot below.

Step 14:
To the right of the word Structure you will see a series of icons representing the elements of a bibliographic entry, as circled below. Au stands for author, Ti for title, and Ye for year.

Step 15:
You must set the structure for each source type and referencing style. In doing so, it may be necessary to remove an element. In this example, the icon Sh stands for short name, which is not to be included in a book referenced in MLA style. To remove this, click on the icon so that it is highlighted and click Remove.

Step 16:
In the screenshot below, notice that the Sh icon has been removed. You must also remove the punctuation in front of the next icon. Simply highlight this punctuation and press the delete button on your keyboard.

Step 17:
In the screenshot below, there are three icons representing author, title, and year. MLA format requires that the city of publication as well as the publisher be included. To insert a bibliographic component, place your cursor in the appropriate location for the component. In this case, the city of publication should be positioned between title and year. Select Address from the drop-down menu (circled below) and click Insert.

Step 18:
Follow Step 17 to insert the remaining elements for your source type. Now you must enter the appropriate punctuation between the components. In this example, the author’s name must be followed by a period. To insert this punctuation, simply highlight the punctuation already present and press the period key on your keyboard.

Step 19:
Notice that the comma has now been replaced by a period. Follow Step 18 to enter the remaining punctuation marks.

Step 20:
If you have another type of bibliographic source, select that from the Type menu, as shown in the screenshot below.
Step 21:
Once you have set the structure for all of your source types, click OK.

Step 22:
In the screenshot below, notice that the bibliography table has been added to the document. You may update this information after adding new references by right-clicking anywhere on the table and selecting Update Index/Table.
